Thursday, July 31, 2014

Pandan Cheddar Cheesecake

I saw someone post on fb:  pandan light cheesecake, many people asking for the recipe, and the green color cake just really makes me feel like trying too.

When i look into my fridge i only have cheddar cheese, and only 3 eggs sitting in kitchen, but i decided not to use my 6", as i think, if i use my 9" mould, the cake should be "short short", "thin thin", and it would be so much easier to cut into bite-size ^_^

I have used pandan emulco in this cake (same as original recipe), as i have no pandan leaf to blend,  and i have also changed the method of folding egg whites (please refer step 9)

So, how is the cake? I can tell you proudly that my Pandan Cheddar Cheesecake is so light, so soft, and i love the cheddar cheese taste which combined well with pandan fragrance. 

The bite size i have cut just an excuse for myself and hubby not to feel guilty to eat one after another, hahaha......

Oya, there is no crack on my cheesecake, and the color is quite even, happy❣

❤♡❤♡❤♡❤♡❤♡❤♡❤♡❤♡❤♡❤

Ingredients:
✴ 3eggs (separate yolk and whites) 
✴ cheddar cheese 3-4slices
✴ 1/2tsp pandan emulco
✴ 1/4tsp cream of tartar
✴ 50g super fine flour
✴ 50g castor sugar
✴ 50ml fresh milk
✴ 50g butter 

Method:
1) use double boil method to melt cheese + butter + milk
2) let the mixture cool down awhile
3) add in pandan emulco, mix well
4) add in egg yolks, mix well
5) sift in the flour, mix well

**You may preheat the oven at 150° now**

6) beat egg white + cream of tartar
7) add in sugar gradually, and beat till soft peak is formed
8) fold in 1/3 of the egg white into the yolk mixture
9) pour in the whole yolk mixture (which you have added some egg white in step 8), into the remaining egg whites, and fold gently with spatula until all well combined
10) bake for 1hour and 10minutes (adjust your own oven temperature and duration, i prefer my cake has "just nice" golden top instead of very brown) 

Tips:
While preheat the oven, do put a tray of water at lowest tray. 
When the batter is ready to bake, put a rack on top of that tray, and put the baking tin on the rack. (please refer last picture at the bottom) 

Tuesday, July 29, 2014

Japanese Cotton Cake 日式棉花蛋糕

美吧?
很多人以為這是japanese cotton cheesecake, 但它不是,因為這蛋糕,跟本沒有cheese.
嘿嘿,那麼又怎麼稱為棉花蛋糕呢?

這蛋糕真的很light, 很soft, 很moist, 感覺很棉花,另人吃了很想再吃,由於沒有cheese, 不会覺得膩。

食譜源於http://janechew.blogspot.com, 但我用super fined flour, 只用一个7"方形模來烘。

❀❀❀❀❀❀❀❀❀❀

Beautiful, soft, light, moist, these are the words i can use to describe this cake. People been asking: is this japanese cotton cheesecake?    Nope, its not, as no cheese were added to the cake and yet it is so nice and so irresistible to eat one slice after another.   

I was referring to the recipe from        http://janechew.blogspot.com, but i made some changes by using super fined flour, and used only one square tin for the whole batter.

❀❀❀❀❀❀❀❀❀❀❀❀❀❀❀❀❀❀❀❀❀❀❀                                          

Ingredients:
  • 30g butter
  • 40g super fined flour
  • 40g evaporated milk
  • 3 egg yolks
  • 3 egg whites
  • 40g castor sugar
Method:
  1. melt butter (double boil) and add in flour while still warm.
  2. whisk egg yolks and slowly add in evaporated milk, mix well.
  3. mixed (2) in (1).
  4. Beat egg whites with an electric mixer until bubbles form. After mixing well, add in sugar in three batches, about one-third at a time, and beat well between additions. Continue to beat until soft peak form. 
  5. Fold in 1/3 egg whites into the egg mixture. Lightly fold in the rest of the beaten egg whites with a spatula, until well combined. 
  6. Pour batter into baking tin.
  7. Bake cakes into preheated oven 170C for about 8 mins. After baking the first 8 minutes, change to 150C and continue baking for additional 20 mins until its cooked.  
  8. Remove cake from the oven. invert the baking tin immediately. Allow it to cool completely before remove the cake
❤✌


Milo Chocolate Chip Cake

♡Another milo cake♡

Found the recipe here , but i did some changes to the ingredients, as i dont have self raising flour, so i have used super fined flour instead. I also replaced the sunflower oil with virgin coconut oil ;)

When i post up the photo to fb, a friend asked is the texture like huat-kueh? means发糕,as she saw one of the slices in photo look "rubbery" to her (maybe), and that slice was actually the one from baking tin edge, which to my surprise to see the baking tin "looked so clean" after i took out the cake (except the bottom).

The texture is definitely moist, and abit chewy (same as the original recipe stated), but when comes to the very next morning, the cake become so much lighter, so moist and its so yummylicious. My hubby and daughter love it so much (",) 

I wonder will the cake looks taller if i followed the original recipe, using self raising flour?

~~~~~~~~~~~~~~~~~~~~~~~~~~~~~~~~

Ingredients:
✪ 1 cup super fined flour 特幻粉,原食譜用自發粉
✪ 3/4 cup castor sugar 幻糖
✪ 1 tsp vanilla extract 香草精
✪ 3 tbsp virgin coconut oil 植物油,我用virgin coconut oil, 健康
✪ 3 tbsp milo powder (milo 粉) 
✪ 1 tbsp cocoa powder 可可粉
✪ 1/2 cup chocolate milk 巧克力奶
✪ 2 eggs 雞蛋

Method:
1) Preheat oven at 180° 預熱烘爐
2) Beat all ingredients together till well mixed. 把全部材料混好
3) Pour batter into baking tin (greased with butter and top with flour) 倒進烤盤
4) Bake for 30minutes or until skewer comes out clean. 烘30分鐘

~~~~~~~~~~~~~~~~~~~~~~~~~~~~~~~~

Yes, that simple ❣ 太簡易了吧,haha ^_^

Bacon Egg Roll

Another lovely breakfast:
❤bacon egg roll❤

I have this original recipe from google, which the recipe only put some spring onion. Since i still have 2slices of bacon left in fridge, i decided to give it a try and created this Bacon Egg Roll ^_^

My hubby went to the nearest shop to help get some carrot and spring onion, but both nearest shops also closed yesterday and today due to raya holiday. So no choice, i can only put in bacon and parsley flakes :)

For cooking, the recipe call for cooking oil, but i have used butter instead, and it certainly taste much nicer ^_^ 
I shall try virgin coconut oil next time, maybe.

Ingredients:
❀ 5 eggs
❀ 2 slices of thick and nice bacon (cut into small pieces)
❀ 1/2 tsp salt
❀ some butter
❀ parsley flakes
(you may add in also carrot and spring onion to make the color combination looks nicer)

Method:
1)  whisk the eggs, add in salt and parsley flakes/carrot/spring onion)
2) heat up a non stick pan, put in small glob of butter to grease the pan
3) sprinkle some bacon into the pan and cook with middle fire, around 1-2minutes.
4) turn the fire to lowest, pour in egg mixture. (not too thin and not too thick)
5) turn your pan around so that the egg mixture cover the pan (form a circle).
6) sprinkle more parsley flakes/spring onion on top
7) stop cooking when you see the egg surface is set
8) carefully put it on a flat surface plate/chopping board
9) repeat step 3-8, until the egg mixture is finished
10) stack up the bacon egg slice by slice (pls refer the last picture at the bottom) 
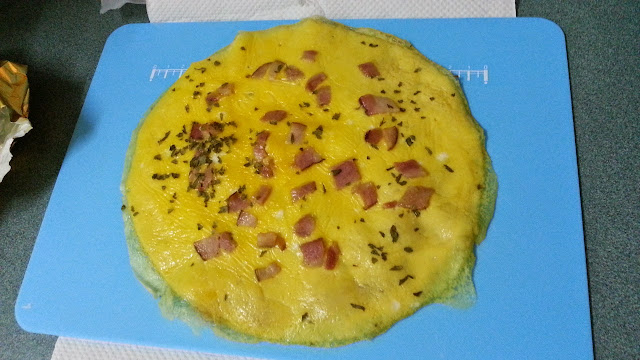
11) after the last piece is done and stack on top of all the bacon egg slices, roll them up carefully, cut and serve ❣

** remember to add some butter before cooking the bacon if you see the pan looks  abit dry **

Monday, July 28, 2014

六筒鳳梨雞 pineapple chicken

這道菜自己創作的,那時真的覺得自己很"掂", 這樣的菜名都讓我想得出來,hahaha

那時,還得照顧兩個小的,她们在厨房一角玩,時不時吵下我,時不時又鬧下。
很忙,但感覺很實在,看見老公滿足的說好吃,更是开心 ^_^

(∩_∩)

Simple Egg Cake

Love these cute egg cakes, at some angle, they do look like eggs❣

Got this recipe from google, as i have balance of eggs that close to expiry date, but lazy to do other cakes that need alot of work (such as separating yolk and white, pressure, haha)

Ingredients:

※ 4 large eggs
※ 200g castor sugar or fine sugar
※ A pinch of salt
※ 180g all-purpose flour
※ 1 tsp baking powder
※ 35g Oil (i used virgin coconut oil)

✌✌✌✌✌✌

Method:

1) Preheat oven at 180C.

2) Whip eggs, castor sugar and salt with a whisk at until light and fluffy.

3) Fold in sifted flour mixture (all purpose flour and baking powder) with rubber spatula until mixed well.

4) Add oil lastly and mix well. 

5) Pour into greased and floured 3.75 X 2-inch flora cupcake moulds (i used muffin tray) 

6) Bake for 20 minutes.

✌✌✌✌✌✌

Sunday, July 27, 2014

Milo Muffin

Milo, a healthy malt drink i have been drinking over 30yrs, and my hubby drinks milo every night before sleep (same goes to my father years ago, but now he is trying to lose weight, heheh).

After falling in love with baking, i started to think what type of cake i can add in milo. So i have found a few recipes, and basically, milo can be added into most of the cakes/muffin/cookies/cheesecake and etc.

For first trial of using milo, i have chosen this: Milo Muffin (i changed the name from milo cake to milo muffin, ermm, just because i used a muffin tray for this, haha)

The baked muffins: if you like milo, trust me, you will eat one after another, and another, and another ^_^


Ingredients: 
- 125g butter
- 1 cup self-raising flour
- 1/3 cup Milo powder
- 1 cup brown sugar
- 2 eggs, beaten
- 1 small packet of Milo 125ml
- 1/2 teaspoon of vanilla essence

Method:
1) preheat oven at 180°
2) Melt the butter, beat the two eggs and mix the dry ingredients (flour and milo powder) together.
3) Add the sugar and the beaten eggs, packet milo 125ml, vanilla essence and melted butter to the bowl of dry mixture
4) Stir to combine well. The batter is supposed to come out watery.
5) Grease the muffin tray holes and pour the mixture in till full to get a nice muffin top.
6) bake for 40 minute 


Butterless Chocolate Chip Muffin

Baked these butterless chocolate chip muffins, for SSL 修成林 charity sale (they having this 七月節 one whole month charity sale).


This is the second time i baked for charity, first time was banana and chocolate rice muffin. If to compare both recipe, i would say this butterless chocolate chip muffin is not as good as banana and chocolate rice muffin. The texture is more densed, which i have been told by the fb friend who shared the recipe. 


For this round i was able to contribute only 16 muffins, due to shortage of sugar and flour, arrgghh, i thought i have enough for at least 45 muffins, so i learnt a lesson, always check ingredients stock one day before baking, and always stock up :)


Ingredients

• 3 cups all-purpose flour 

• 4 tsp baking powder

• 1/2 tsp salt

• 2 eggs, room temperature 

• 1 cup granulated sugar

• 1 cup fresh milk

• 1/2 cup vegetable oil

• 1 tsp vanilla essense

• 1 cup chocolate chips(i used double color chocolate chip)


Method: 
1) Preheat oven to 170°. 
2) In a mixing bowl, sift in together flour, baking powder, salt, cinnamon. 
3) In a bigger bowl, whisk together eggs and sugar until combined. Mix in milk, oil, and vanilla. 
4) Fold dry ingredients into wet ingredients and mix everything together. 
5) The batter will be quite thick and abit lumpy too. Fold in the chocolate chips.
6) Divide batter among prepared muffin cups.
7) Bake at 170° for 5 minutes. Reduce oven temperature to 160°.and continue to bake for 20 minutes until tops are lightly golden.

Saturday, July 26, 2014

♡ly Breakfast Cup

Lovely? 這樣的早餐会另你唾涎嗎?哈哈。。。

心血來潮,突然想做個簡單而溫飽的早餐,所以,就找來這breakfast cups食譜啰。

單看它们的外在,以經另我和老公有一股想快快咬下去的衝動,haha.

Seriously easy, delicious, & perfect for a warm brekkie ^_^

Note:要用 muffin pan 的

Ingredients: 要做几个,就prepare几份
❀ bacon slices 不要薄薄的,厚点好
❀ egg
❀ bread
❀ mozzarella cheese
❀ parsley flakes

Method:
1)  preheat oven 170°

2) cut the bread round shape acording to the hole size of your muffin pan

3) cook the bacon slices on a non stick pan for around 3minutes, 切記:不用很熟

4) lay the bacon slice round the edge of the muffin pan hole, and form "a cup"

5) put in the round cut bread at the bottom of the muffin pan hole 

6) sprinkle some mozzarella cheese (or as much as u like)

7) crack an egg into the "cup", carefully, not to break the yolk (unless you prefer a scrambled egg look, but not so lovely loh)

8) bake for 15 minutes, until u see the egg whites are set, the yolk are not over cooked but not runny too.

9) sprinkle some parsley flakes 

I did trim off some of the over-cooked-edges of the bacon :p,  好看点嘛,haha

❀❀❀❀❀❀❀❀❀❀❀❀❀❀❀❀❀❀❀❀❀❀❀

Friday, July 25, 2014

Pandan Chiffon Cake

What do you think? nice?

I adore my chiffon cake for veryyyy long before i started to unmould it, and it took me long before i cut the first slice, as its just sooo beautiful, and i never expect such a nice dome, nice face, so smooth, so perfect, and taste? very nice too.

But i think next time i shall use more pandan leaves, or add some pandan emulco/paste to make the cake looks more "greener", yup❣

Actually it took me quite some time looking through quite a few recipes of chiffon cake, as i have seen many post on fb asking why they failed, and that is how and why would i been so carefully to have read through many recipes, before i take and try the "chosen one", hahaha

Ingredients:
✪110g cake flour
✪5 eggs (55g)
✪60ml fresh coconut milk
✪60g oil (I used virgin coconut oil)
✪1/4 tsp baking powder
✪10 pandan leaves
✪4 tbsp water
✪120g castor sugar
✪1/2 tsp vanilla extract

Method:
I think i should give a credit to this blogger since i followed each and every single step, even followed and used my hand to do the mixing:  The Baking Biatch.

Love the hand-mixing part though ;)

Peach Pound Cake

After opened a can of peach slices which i used only half of the can for the dairy free white cake, i decided to bake a peach cake.

Googled quite a few peach cake recipe, finally decided to do this peach pound cake, base on the ingredients i have in my 香香厨房 ^_^

Lovely, moist, 真係好吃㗎,hahaha 


Ingredients:
- 1 cup butter, softened

- 2 cups white sugar

- 4 eggs

- 1 tsp vanilla extract

- 3 cups all-purpose flour

- 1 tsp baking powder

- 1/2 tsp salt

- 2 cups peaches, chopped


Method:
1) Preheat oven at 165 degrees C.
2) Butter a tube pan and coat with white sugar.
3) In a large bowl, cream together the butter and sugar until light and fluffy.
4)  Add the eggs one at a time, beating well with each addition, then stir in the vanilla.
5) Reserve 1/4 cup of flour for later, and sift together the remaining flour, baking powder and salt. Gradually stir into the creamed mixture.
6) Use the reserved flour to coat the chopped peaches, then fold the floured peaches into the batter.
7) Pour evenly into the prepared tube pan.
8) Bake for 60minutes, or until a toothpick inserted into the cake comes out clean.
9) Allow cake to cool in the pan for 10 minutes.

Wednesday, July 23, 2014

Hokkaido Cupcake 北海道杯子蛋糕

又是好朋友給的食譜,很喜歡。。。

Ingredients :
A)
4 --- egg yolks
40g --- super fined flour
30g --- salad oil
30g --- fresh milk
20g --- castor sugar

(B)
4 --- egg whites
40g --- castor sugar
1/4 tsp  --- cream of tartar

Method :
Preheat oven at 160°
1. Cream together butter and sugar,add in salad oil and fresh milk, mix well。
2. Sift in flour, and use a spatul to mix well
3. Beat egg white together with cream of tartar until foamy,add in sugar gradually, beat until it reaches soft peak。
4. Fold in egg white to egg yolk mixture, by using a spatula, in 3 batches. 。
5. Pour the batter into cupcake liners。
6. Bake 20-25minutes。
7. After baked, just squeeze in prepared custard and deco as you like

Simple Breakfast for hubby 給老公的簡單早餐

有一天早上,心血來潮,弄了這个超簡單但又窩心的早餐給老公,當然老公很喜歡,不然我也不覺得窩心 ^_^

I ❤ Ü

Banana Chiffon Cupcake

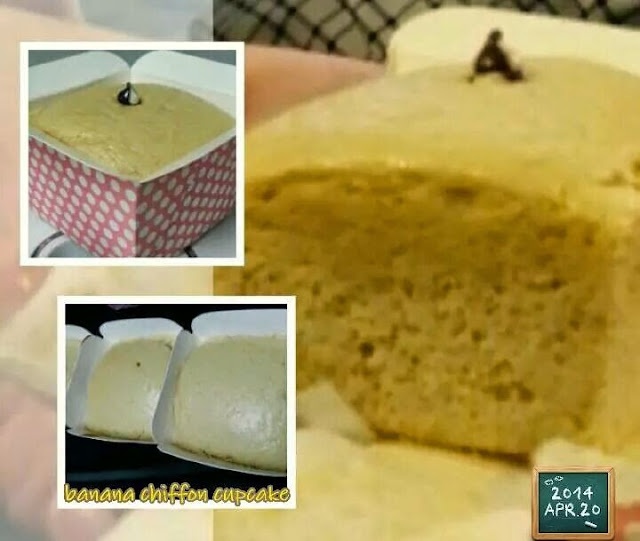
This is one of my favorite: soft and fluffy banana chiffon cupcake.

A healthy treat for my lovely family: no butter, use virgin coconut oil, and not using white sugar.
-----------------------
Ingredients:
✴ 4 egg yolks
✴ 1 tbsp brown sugar
✴ 50g virgin coconut oil
✴ 2 very riped banana mash+ 3 tbsp fresh milk
✴ 80g super fined flour
-------------------------
✴ 4 egg whites
✴ 2 tbsp brown sugar
-------------------------

Method:
1) preheat oven at 160°
2) whisk egg yolks and brown sugar till thick.
3) add in virgin coconut oil and banana mix (mix banana mash and milk together before adding into the batter)
4) add in flour, mix well.
3) in another bowl, beat egg whites till foamy, add in brown sugar gradually and continue beating till it reaches hard peak.
5) fold in egg whites to yolk mixture with a spatula, in 3 batches, fold gently.
6) pour the batter into cupcake liners.
7) tap cupcakes gently on table top to release trapped air bubbles.
8) bake for 20minutes

Tiger Cake

I have made this a month ago, and i was actually following zebra cake recipe, yet, the first moment bb Megan saw the cake, she straightaway said: "tiger!  Tiger!

Ahhh.... i have made a tiger cake, not zebra. So, this cake is named as: Tiger Cake.

The recipe is same as zebra cake, here.
So, what have i done and made the stripes so differently? the answer is: the spoon i used ^_^

For zebra cake, i have used a normal tablespoon to scoop the batter one spoon by one spoon, yet for tiger cake, i have used a bigger spoon, the spoon that we normally use to drink soup, not those western style mushroom soup spoon, but you can see this kind of spoon come together with noodle soup/bak kut teh.

I was not having much of time and thats why i have used bigger spoon to scoop very big spoonful of batter each time (original & cocoa batter), and that explains how i created the different stripes, haha.

Tuesday, July 22, 2014

Chocolate Horlicks Doggie Cookies

Cute 冇?
梗係 Cute 啰 ❣

Specially made for my cute bb Megan ^_^

Ingredients:
180g butter, soften at room temperature
80g Horlicks (chocolate flavour)
200g cake flour
25g corn flour
25g soymilk powder
100g chocolate chips
some chocolate rice
some Koko Krunch


Method:
  1. Pre-heat oven at 140deg C. Line baking tray with baking paper, set aside. 
  2. Sieve cakr flour, corn flour and soymilk powder.
  3. Cream butter and chocolate Horlicks until well mixed. 
  4. Put in cake flour, cornflour and milk powder and use hand to mix well to form dough. 
  5. Divide dough into 10g each. Put three chocolate chips into each piece of dough and roll into a ball. You may press to flatten the face abit, and make some with round faces, or any shape you want. 
  6. Insert two pieces of Koko Krunch to form the 'ears', chocolate rice for the 'eyes', and a chocolate chip in the centre for the 'nose'.
  7. Bake at 140 deg C for about 25 minutes, and bake another 5 to 10 minutes more at 150°
  8. Leave to cool on wire rack before storing in an airtight container.
Tips:
You may want to make different doggie faces with different expressions just like mine:
- happy
- sad
- sleeping
- fierce
- "flying" ears

Snow Icecream Cheesecake

Another birthday cake for my hubby: Snow Icecream Cheesecake

Snow - grated cheddar cheese as topping
Icecream - the cake has cut into 3 layers, with cream cheese + vanilla icecream mix

I deco the cake with lady fingers, as to cover my cake that was quite messy with the cream, which i didnt want to trim the cake (as my fb friend told me it would be nicer to trim the cake). After "sticking up" the lady fingers, i tied it up with red ribbon. A big strawberry placed at the center representing my hubby, and 3 heart-shaped strawberries surrounding the big one (representing me and our two lovely princess) ^_^

Ingredients:

(A) 7 egg yolks, 100ml corn oil, 100g fresh milk, 150g all purpose flour

(B) 7 egg whites, 120g castor sugar


Method:

1) mix well ingredients (A)

2) beat (B), until it reaches hard peak

3) fold in (B) to (A), in 3 batches

4) 8" square mould, 170°, 45minute 

5) invert the cake after its cooked.

6) cut the cake into 3layers

Now, prepare the cheese and icecream mix filling:

* 250g cream cheese

* 120 butter

* 50g condensed milk

* 100g whipping cream

* 100g  vanilla icecream mix

1) cream together cream cheese, butter, and condensed milk.

2) add in whipping cream and vanilla icecream mix, mix well.

3) pour the cream cheese icecream mixture onto a slice of cake, stack up with another layer of cake and pour the mixture. Repeat this until the batter is finished.

For the SNOW on your cake, just sprinkle some grated cheddar cheese ^__^


Butterless Chocolate Zebra Cake 巧克力斑馬蛋糕

Made this simple chocolate zebra cake to celebrate my hubby's birthday (pre birthday celebration).

Since my mom in law allergy to dairy product, i have made this cake butterless, using corn oil instead.

Everyone loves the cake, as its so moist and light, my hubby comment it as :入口即溶 (means melt in mouth), haha...

Ingredients:
❀ 6 egg whites
❀ 130g icing sugar
❀ 6 egg yolks
❀ 2 whole eggs
❀ 100g corn oil
❀ 130g super fined flour
❀ 20g cocoa powder & 3tbsp hot water

Method:
1) mix well egg yolks and whole eggs
2) add in corn oil, mix well
3) add in the sifted flour, mix well
3) beat the egg whites until foamy, gradually add in the sugar, beat until the egg whites reach hard peak (refer my photo)
4) fold in 1/3 of the egg whites into yolk mixture, fold gently with a spatula
5) fold in remaining egg whites to the mixture
6) divide the batter to 2 portion
7) add hot water to cocoa powder, and mix well in one of the divided batter
*You may preheat oven now at 150° *
*do not line the baking tin*
8) scoop a tbsp of original batter and pour slowly at the middle of the round baking tin
9) scoop a tbsp of cocoa batter and pour slowly at the middle of the original batter that you just poured in (use different spoon ya)
10) repeat step 8 & 9, until you finish both original and cocoa batter
11) bake for 30minutes
12) bake another 15minutes at 160°
13) invert the cake after its cooked

For deco, i sprinkle cocoa powder, and used white chocolate for the writing and ❤♡ on the cake ^_^


Sunday, July 20, 2014

Dairy Free White Cake

Baked this for my mom-in-law, in celebration of mother's day.

Have been searching up and down for a dairy free cake, as my mom-in-law allergy to dairy products.

My friends told me to do chiffon, which has no milk no cream no cheese in it, yet i think a chiffon cake is too light for deco, nothing much can do, and the hole in the middle of the cake, for me, is somehow 怪怪地 if to deco.

Found this recipe in the end, the cake came out only around 3cm tall, same as the photo i saw from the recipe i followed. The cake taste nice of lemon, yet the outer ring became dry and hardened after fridged. 

Ingredients:

- 250 plain flour

- 250g caster sugar

- 1.5 tsp -bicarbonate soda

- 1 tsp salt250ml soy milk (or other dairy free milk)

-.60g coconut oil (or vegetable/rapeseed oil)

- 3 tbsp white wine vinegar (i use lemon juice) 

- 2 tsp vanilla extract


Method: 

1. Preheat oven to 160c with fan

2. Line a 20cm cake tin.

3. Combine all the dry ingredients and mix together with a whisk.

4. Mix together all the wet ingredients. 

5. Pour the wet ingredients into the dry ingredients. Mix well, then pour the batter into baking tin.

6. Bake for 25-30 minutes until the cake is golden color. 

7. Allow to cool in the baking tin for a while, before moving to a cooling rack.

For decoration, i have used peach slices to deco as a flower, and surround the cake with heart-shaped marshmallows ❤

Saturday, July 19, 2014

Sunfl❁wer Cake

This was the first birthday cake i baked, to celebrate my bb Charlize first birthday ^_^

Its a baked cheesecake, top with peach slices to form the sunflower petals, the yellow one are famous amos chocolate balls and chocolate chip at the center, and 2 little beetle, haha...

Nice, very nice cheesecake (although the side shrinked as i didnt leave it in oven for awhile after baked, too rush), and really satisfied with my deco for the cake, i give myself 90%, heheh ;)

Hong Kong Egg Tart 港式蛋撻

I just posted the recipe of making "mini blueberry cheese tart", since the tart shell was premade one, i only shared the recipe of the cheese filling. But one fb friend has requested the recipe for the egg tart shell too. So here i post my Hong Kong Egg Tart recipe, which i made the tart shell myself too ^_^

Ingredients (for tart shell/crust)
❀225g plain flour 
❀125g butter 
❀55g icing sugar 
❀1 egg, whisked 
❀1/2 tsp vanilla extract 

Ingredients (for the custard)
❀3eggs
❀110g caster sugar
❀225ml hot water
❀85ml evaporated milk
❀1/2 tsp vanilla extract

Making the tart shell/crust:
1) Place butter at room temperature until softened or double boil it.
2) Cream the butter and sugar with mixer over medium speed until the mixture is smooth, fluffy and light in color. 
3) Add in whisked egg and vanilla extract, mix well. 
4) Sift in flour in two batches, scraping down the sides of the bowl between additions with a spatula, and make sure all ingredients are mixed well.
5) Knead into a dough (by hand)  
6) pinch some dough n put in the middle of tart mould. 
7) Lightly press the dough with your thumbs, press it from bottom till side. While pressing the dough, if you can, turn the tart mould clockwise/anti-clockwise in order to make an even tart shell.
8) Trim away any excess dough. 

Now, preheat oven at 200°

Making the custard/filling:
1) Add sugar into hot water, mix until completely dissolved. 
2) Whisk egg with evaporated milk.
3) Pour in sugar water. Mix well. 
4) Sift egg mixture to get a very smooth egg mixture.
5) Pour the egg mixture into each tart shell carefully.

Baking the egg tart:
• Position the tray of eggtarts in lower rack.
• Bake tarts for 10 - 15 minutes until you see the edges are lightly brown. 
• Lower the heat to 180C. Keep an eye on the tarts. Once you see the custard being puffed up, pull open the oven door about 2 inches.
• Bake for another 10 - 15 minutes until the custard is cooked through.
• Insert a toothpick into the custard. If it stands on its own, it’s done❣

Mini Blueberry Cheese Tart 迷你藍莓芝士撻

好吃,非常好吃!
Delicious, so so so delicious❣

But since i dont have mini tart mould (i only have big ones), so i decided to buy the premade tart shell from bakery shop.

❤❤❤❤❤❤❤❤❤❤❤

Ingredients: (for cheese filling)
• 250g cream cheese
• 50g castor sugar
• 30g butter
• 1 egg
• 50g fresh milk or full cream milk
• 2tbsp all purpose flour
• some blueberry jam

Method:
Preheat oven at 160°
1) double boil butter and cream cheese until smooth, mix in sugar with spoon
2) add in egg and milk, mix well
3) add in flour, mix well
4) pour into mini tart shell
5) put some blueberry jam, use a toothpick to draw some marble effect (my jam quite thick, hard to draw)
6) bake for 10-12 minutes

Blueberry cheese tarts are nice to eat warm, but best to eat after chilled ^_^ 

To get recipe of tart shell, please refer my Hong Kong Egg Tart recipe. 


Friday, July 18, 2014

Chocolate Yogurt Pop

This is the second time i made this chocolate yogurt pop. A very nice and healthy treat for my hubby and bb Megan ^_^

Ingredients:
❁ 6 ounce fat free vanilla yogurt
❁ 3/4 cup chocolate milk
❁ 1 large or 2 small riped bananas
❁ 3 tbsp chocolate chips
❁ 1/4 tsp vanilla extract
❁ 8-12 paper cups (depends on your paper cup size, if its small like mine, you might need 12)
❁ 8-12 aluminium foil (cut to the size that can cover the paper cup)
❁ 8-12 wooden popsicle sticks

Method:
- blend together banana, yogurt, chocolate milk, vanilla extract with a blender
- stir in 2 tbsp chocolate chips
- sprinkle remaining chocolate chip on bottom of paper cups
- put all paper cups on a tray
- pour in the blended mixture
- cover the paper cups with aluminium foil
- freeze for 30minute
- carefully take out the tray, make a small slit in the middle of each paper cups's aluminium foil, and insert the wooden popsicle stick in the centre
- freeze for at least 4hours
- when ready, peel off the foil, peel away the paper cup, and enjoy ❣

Monday, July 14, 2014

No-bake Tiramisu (with lady fingers)

 Ingredients:
3 eggs, separated
250g mascarpone cheese
75g sugar
One pack of lady fingers
Half cup of coffee (black)
25ml brandy (i omit this, since i have kids to eat this)
Cocoa powder


Method:
1) prepare baking tin and line with greeseproof paper
2) place the lady fingers vertically to the wall of the cake tin, one by one, side by side, and then put aside the cake tin to prepare the cheese mixture.
3) beat the egg yolk with sugar until creamy and frothy
4) add in mascarpone cheese and brandy
5) beat egg white till stiff
6) fold the egg whites into yolk mixture
7) lightly soften lady fingers one by one with the coffee (dip in)
8) arrange lady fingers at the base of the cake tin, make sure the base is fully covered by the lady fingers. U may cut the fingers according to gap/space that need to be covered up. 
9)  pour a layer of the cheese mixture, cover up the fingers
10) repeat step 8 & 9 one more time
11) fridge your tiramisu for at least few hours
12) sprinkle cocoa powder on top and enjoy❣

^_^

Hubby and i love my tiramisu so much ✌


Japanese Style Steamed Cake

Backdate posting.

Got this recipe from facebook, love it soooo much as its soooo fluffy and taste so good.

Hubby and bb Megan both love it too ^_^

培根金針菇卷 Enoki Mushroom Bacon Roll

不錯吧,這道菜
看似复杂但很簡單
看似容易但也蠻累 (緊張,所以累,haha)