Showing posts with label cheese. Show all posts

Saturday, November 7, 2015

Bacon Egg Cheese Sandwich

Throwback

31st Aug 2015

Simple beakfast for hubby

Saturday, October 25, 2014

花籃早餐 Breakfast Basket

週末囉。。。 來,看看最后那張圖,是我創的花籃早餐,美嗎?會讓妳們唾延嗎? Oh weekend, oh breakfast❣ look at the last picture, i have made this Breakfast Basket out of my own creativity, lovely?

做法很簡單,可以參考以下圖片。Method is simple, you may refer below pic, which shows you step-by-step "how-to".

注:在第5步驟,灑上芝士后,放幾茶匙蛋白,或多點也無所謂 (",)


Ingredients:
bacon, bread, cheese, broccoli, egg (separated yolk and white) 

❀✿❀✿❀✿❀✿❀✿❀✿

Wednesday, October 22, 2014

Mozzarella Stick 乳酪棒


Crispy, gooey, delicious mozzarella cheese stick. ❀✿Love it✿❀

Mozzarella sticks are great snack, which you may have tried before at any restaurants or party catering. It is so nice to eat it on its own, or to dip it with any sauce or condiment you like.

Preparation is easy, to be exact, is super easy. I like to cut the cheese stick from a block, as i can control the thickness i like, and i have planned to try out next time: baked mozzarella balls, sounds great?  (",) 

One thing to take note: do not use too high heat while frying. By using too high heat, the skin cooked faster than the cheese inside to be melted/warmed.

♨♨♨♨♨♨


2eggs (add 1tbsp water) , some flour, bread crumbs (with all spice seasoning)  2雞蛋 (加1湯匙水),麵粉,麵包糠 (加入調味料) 

Mozzarella block 乳酪塊

Cut into pieces according to the thickness you like. If you follow this thickness, one block can cut into 8 sticks. 如果跟着這厚度,一塊可以切出8條


Dredge the cheese stick in the flour until its fully coated 把乳酪條在麵粉裡打撈


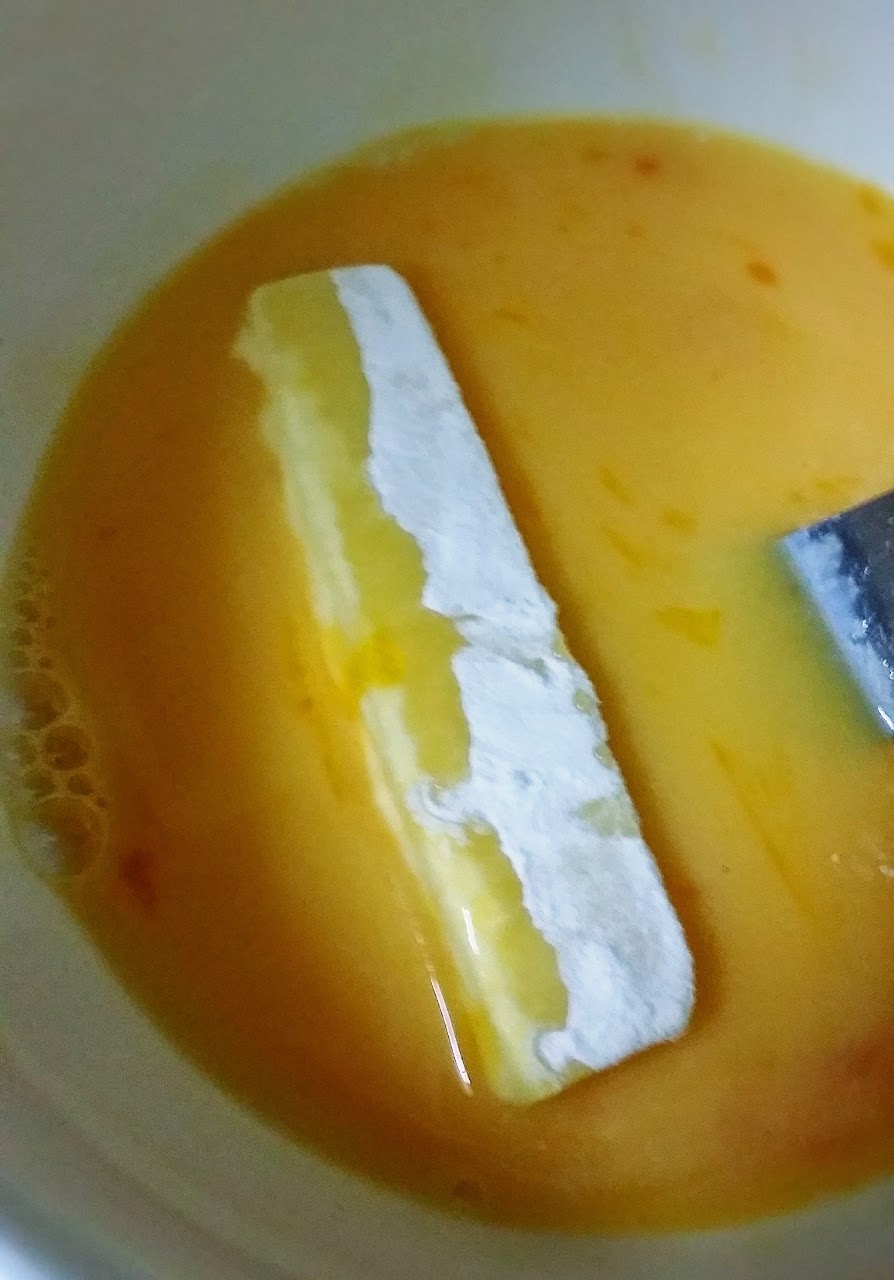
Place it in the egg water mixture 把它放進雞液裡撈

Place it into the bread crumbs, roll it all over 放進麵包糠裡,确保面包糠完全沾上

Dip the cheese stick into the egg bowl again 再浸入雞蛋液裡

Lastly, one more round of bread crumbs 最后,再一次沾上麵包糠

Well prepared, freeze it overnight or minimum 6hours. 準備好了,冷藏最少6小時以上或隔夜


Put into hot oil carefully and fry for about 2minutes 小心放進熱油裡炸,大概2分鐘


Voila❣ 享用吧 ^_^

Saturday, September 13, 2014

芝士蛋麵包 Cheesy Egg Bread

今天的早餐,簡單,好味 ♥
我已經把步驟放進照片裡,超容易的哦 ^_^
Ingredients:
♧bread, as many as you like
♧cheese slice, depends on how many you wanto make
♧egg 1-2
♧some butter

Sunday, August 31, 2014

火腿芝士蛋治 egg✢ham✢cheese sandwich box

簡單又好味的三明治。
我已經把步驟都放進照片裡,其實和普通的火腿芝士蛋治沒什麼不同味道,但過程就好特別。
過程特別,吃的時候,感覺當然也特別,haha

Saturday, August 23, 2014

Blueberry Yogurt Cake 藍莓優格蛋糕

今天特別做了這blueberry優格蛋糕來賀我老闆兼朋友的"cow one", means "牛一", 也就是生日啦。。。

蠻趕的,從office赶回家around 5pm, 然後再從家回到bdr utama, 又塞車,又擔心蛋糕。

吃過晚餐,當侍應把蛋糕捧出來時,我蠻擔心的,不知道蛋糕還ok嗎,有塌嗎,會不熟嗎,等等。還好,蛋糕完整美美的,而且很好吃哩 

✌(∩_∩)✌

Ingredients:
✿ 3 egg yolk
✿ 120g plain yogurt (room temperature)
✿ 35g butter (melted)
✿ 30g plain flour
✿ 15g corn starch
✿ 20ml whipping cream
❀ 3 egg white
❀ 50g caster sugar
♥ some fresh organic blueberries ♥

Method:
1)  combine melted butter and yogurt together
2) add in egg yolk and whipping cream, mix well
3) sift in both plain flour and corn starch

** preheat oven at 160°**

4) beat egg white till bubbles are formed
5) add in sugar in three batches
6) beat until soft peak is formed
7) fold 1/3 of the egg white into the yolk mixture (use a spatula)
8) pour the yolk mixture slowly to the remaining egg white, fold gently.
9) pour half of the batter into baking tin,  mine was 7".
10) put in some blueberries
11) pour in the remaining batter.
12) bake (water bath) for 50minutes or until cooked.

My decoration:
~ i have sprinkled grated cheddar cheese on top (4邊,方形)
~ i spread some mixed-berries yogurt at the center of the cake
~ more blueberries to put on top of the mixed-berries yogurt.

Saturday, July 26, 2014

♡ly Breakfast Cup

Lovely? 這樣的早餐会另你唾涎嗎?哈哈。。。

心血來潮,突然想做個簡單而溫飽的早餐,所以,就找來這breakfast cups食譜啰。

單看它们的外在,以經另我和老公有一股想快快咬下去的衝動,haha.

Seriously easy, delicious, & perfect for a warm brekkie ^_^

Note:要用 muffin pan 的

Ingredients: 要做几个,就prepare几份
❀ bacon slices 不要薄薄的,厚点好
❀ egg
❀ bread
❀ mozzarella cheese
❀ parsley flakes

Method:
1)  preheat oven 170°

2) cut the bread round shape acording to the hole size of your muffin pan

3) cook the bacon slices on a non stick pan for around 3minutes, 切記:不用很熟

4) lay the bacon slice round the edge of the muffin pan hole, and form "a cup"

5) put in the round cut bread at the bottom of the muffin pan hole 

6) sprinkle some mozzarella cheese (or as much as u like)

7) crack an egg into the "cup", carefully, not to break the yolk (unless you prefer a scrambled egg look, but not so lovely loh)

8) bake for 15 minutes, until u see the egg whites are set, the yolk are not over cooked but not runny too.

9) sprinkle some parsley flakes 

I did trim off some of the over-cooked-edges of the bacon :p,  好看点嘛,haha

❀❀❀❀❀❀❀❀❀❀❀❀❀❀❀❀❀❀❀❀❀❀❀

Saturday, July 19, 2014

Sunfl❁wer Cake

This was the first birthday cake i baked, to celebrate my bb Charlize first birthday ^_^

Its a baked cheesecake, top with peach slices to form the sunflower petals, the yellow one are famous amos chocolate balls and chocolate chip at the center, and 2 little beetle, haha...

Nice, very nice cheesecake (although the side shrinked as i didnt leave it in oven for awhile after baked, too rush), and really satisfied with my deco for the cake, i give myself 90%, heheh ;)

Mini Blueberry Cheese Tart 迷你藍莓芝士撻

好吃,非常好吃!
Delicious, so so so delicious❣

But since i dont have mini tart mould (i only have big ones), so i decided to buy the premade tart shell from bakery shop.

❤❤❤❤❤❤❤❤❤❤❤

Ingredients: (for cheese filling)
• 250g cream cheese
• 50g castor sugar
• 30g butter
• 1 egg
• 50g fresh milk or full cream milk
• 2tbsp all purpose flour
• some blueberry jam

Method:
Preheat oven at 160°
1) double boil butter and cream cheese until smooth, mix in sugar with spoon
2) add in egg and milk, mix well
3) add in flour, mix well
4) pour into mini tart shell
5) put some blueberry jam, use a toothpick to draw some marble effect (my jam quite thick, hard to draw)
6) bake for 10-12 minutes

Blueberry cheese tarts are nice to eat warm, but best to eat after chilled ^_^ 

To get recipe of tart shell, please refer my Hong Kong Egg Tart recipe. 


Monday, July 14, 2014

No-bake Tiramisu (with lady fingers)

 Ingredients:
3 eggs, separated
250g mascarpone cheese
75g sugar
One pack of lady fingers
Half cup of coffee (black)
25ml brandy (i omit this, since i have kids to eat this)
Cocoa powder


Method:
1) prepare baking tin and line with greeseproof paper
2) place the lady fingers vertically to the wall of the cake tin, one by one, side by side, and then put aside the cake tin to prepare the cheese mixture.
3) beat the egg yolk with sugar until creamy and frothy
4) add in mascarpone cheese and brandy
5) beat egg white till stiff
6) fold the egg whites into yolk mixture
7) lightly soften lady fingers one by one with the coffee (dip in)
8) arrange lady fingers at the base of the cake tin, make sure the base is fully covered by the lady fingers. U may cut the fingers according to gap/space that need to be covered up. 
9)  pour a layer of the cheese mixture, cover up the fingers
10) repeat step 8 & 9 one more time
11) fridge your tiramisu for at least few hours
12) sprinkle cocoa powder on top and enjoy❣

^_^

Hubby and i love my tiramisu so much ✌