Sunday, October 12, 2014

Vegan Milo Muffin (butterless, eggless)

今天是觀音菩薩出道修練記念日,我們吃齋,也弄了些muffin給"修成林"做義賣。但在准備材料時才發現不夠糖,只能弄出12粒,因為通常我會弄30-40粒左右,所以這次就不拿去給"修成林", 自己家人吃囉。。 Today is GuanYin-day (chinese calendar), a vegetarian day for us as a buddist, therefore i have made these Vegan Milo Muffin for SSL charity sales. Halfway preparing ingredients only realized i have not enough sugar, end result? only 12 muffin can be made, but usually i will make around 30-40, so this time i have decided not to bring to SSL.

Ingredients:
~ 220g all purpose flour 面粉
~ 150g sugar 糖
~ 25g milo powder 
~ 1 cup water 水
~ 1/2 cup corn oil 玉蜀黍油
~ 1/2 cup fresh milk 鮮奶
~ pinch of salt 少許鹽
~ 1tbsp baking powder 發粉
~ 1tsp vanilla essence 香草精

Method:
1) preheat oven at 165° 預熱烘爐

2) sift all powder, milo, sugar, salt together into a mixing bowl 把粉類,糖,鹽,milo 全篩進鋼碗

3) add in oil, water, milk, and lastly vanilla essence. 加入油,水,奶,最后是香草精

4) bake for 20-25minutes till the skewer comes out clean 烘20-25分鐘直到牙籤插入沒有沾粘物


Saturday, October 11, 2014

Breakfast Soufflé 早餐•舒芙蕾

又是週末囉,又是一道簡易早餐給我自己和愛人:) happy weekend everyone, here's another simple breakfast for myself and my love one :)

在网上看到這食譜,喜歡它用的是簡單材料,但卻能弄出那麼美的舒芙蕾圓頂 Saw this recipe online, was impressed with so simple ingredients but come out with a nice souffle dome.

材料簡單,步驟簡單,但有些地方要注意Ingredients are simple, method is simple, yet, there some step which you need to take note:
1) 蛋白 - 不能打太久 egg white - do not over beat

2) 烘的時間 - 不能超過12 分鐘,除非妳要的蛋黃是熟透的 cooking time - not more than 12 minutes, unless you want a cooked yolk


Ingredients: (2 ramekin, 2人份) 
~ 2 eggs 雞蛋
~ pinch of salt 少許鹽
~ pinch of black pepper 少許黑胡椒粉 (optional 可選擇不放)
~ 1tbsp grated cheddar cheese (車達芝士絲) 
~ parsley flakes (洋香菜片)


Method:
1) preheat oven at 190° 烘爐預熱
2) lightly grease ramekin with butter 用牛油稍為涂在ramekin內
3)  separate the eggs 把雞蛋分白和黃
4) beat egg white till SOFT PEAK,which in high speed not more than 50 seconds 高速打蛋白至濕性發泡,大概不超過50 秒
5) fill up ramekin with egg white till it is full 把蛋白放入ramekin到頂
6) make a well at the center 在中間開個洞
7) pour in egg yolk slowly 慢慢倒進蛋黃
8) sprinkle pinch of salt, black pepper and cheese 灑上鹽,黑胡椒粉,芝士
9) cover back with egg white 把蛋白蓋好
10) bake for 12 minutes 烘12 分鐘
11) sprinkle some parsley flakes before served 灑上洋香菜片,享用 ♥


Greased ramekin

Egg separated

Egg white at soft peak

Fill the ramekin with egg white till top

Egg yolk in the well

Sprinkle salt, pepper and cheese

Cover back the egg white

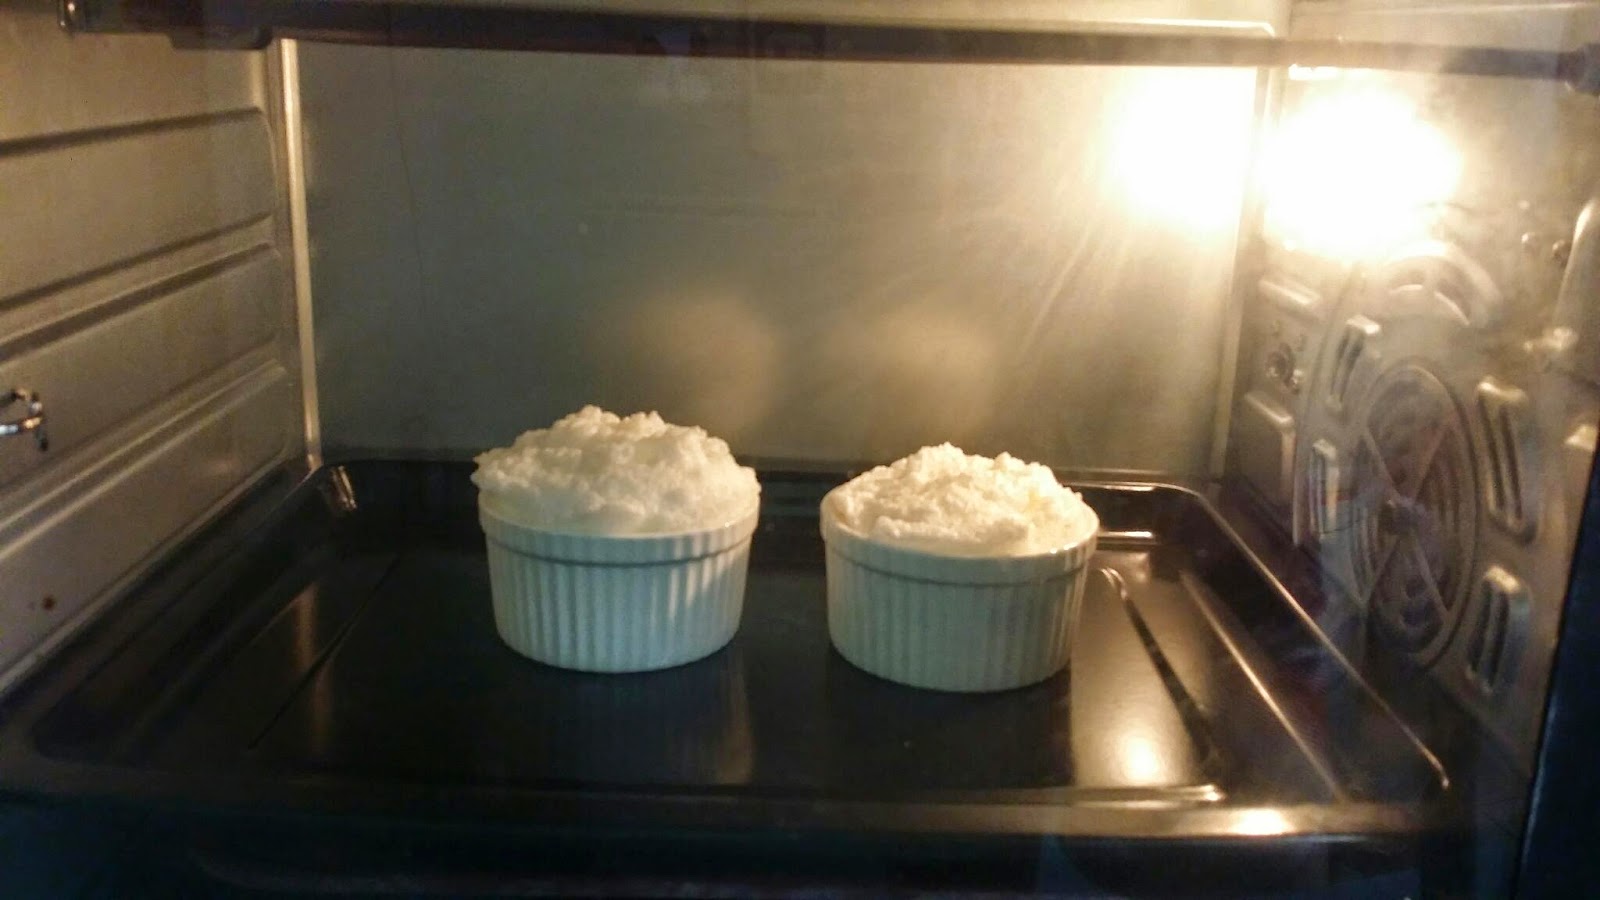
In the oven

Rising high especially the left one, as my oven temperature is not even, left side always cooked faster


Out from oven

Sprinkle parsley 


Breakfast Souffle  (",) 

Steamed Egg White Milk Pudding 蒸蛋白鮮奶布丁

給寶寶健康的早餐This is a healthy choice for my babies: 蒸蛋白鮮奶布丁 Egg White Milk Pudding

之前弄過有蛋黃的,有點像chawanmushi的質感 ^_^.而這食譜只用蛋白的呢?超滑的,就像在吃豆腐漿哦。。I have made one with egg yolk before: Steamed Egg with Fresh Milk, the texture was like chawanmushi ^_^ And this with egg white one? Super nice and super soft texture, just like eating taufufa.

這蒸的布丁可以熱吃也可以冷凍后再享用更棒 One more good point about this steamed pudding? it can be served warm and even better after chilled.

試試吧 Give it a try ;)

✿♥✿♥✿♥✿♥✿♥✿♥✿♥✿♥✿
Ingredients:
~ 2-3 egg whites 蛋白
~ 170ml fresh milk 鮮奶
~ 1tsp sugar 糖

Method:
1) mix everything together GENTLY. 把全部材料混合,輕輕的攪拌就可以了
2) sift twice 篩兩次
3) pour into ramekin or bowl 倒進ramekin/碗
4) cover top with cling wrap 用保鮮紙包住
5) steam in high heat (hot boiling water)  for 10minutes 水滾后,大火蒸10 分鐘
6) off heat, let the pudding stay inside the steamer or wok for another 10minutes 熄火后再焗多10 分鐘 (不要開蓋) 
7) enjoy ^_^ 享用


Friday, October 10, 2014

Mrs Lim's Cotton Cheesecake 林太棉花芝士蛋糕

之前做過Japanese Cotton Cake 日式棉花蛋糕,非常喜歡那入口綿綿軟軟的口感,但試過了 BC FionaLau 的 melt in mouth cheesecake, 才真正体會到,何為 melt-in-mouth 入口即溶 ♥I have made Japanese Cotton Cake (no cheese) before, super like the super soft and super moist texture, but after trying this recipe from BC Fiona Lau:  melt in mouth cheesecake, only i know the real meaning of "melt-in-mouth"

我把食譜稍為改了,就是成份加了點,和把水沐式換去蒸烘式。I have altered abit the recipe, added ingredients, and also used steam-bake instead of water bath (i didnt realize i have finished my aluminium foil) 

這只是個4"大的蛋糕,怕肥囉,芝士蛋糕總是這樣讓我又愛又恨 (~o~) 但是這蛋糕,只有試過的人,才會真正明白那种heavenly 美味的口感 :) This is just a 4" cake, why? fat lor, seriously, i simply gained few kg just because of baking. For this cake, only those who tried the recipe will know the heavenly feeling after putting the cheesecake into mouth. Mmmmm.... ;) 


Ingredients: 

❀ cream cheese 110g 芝士奶油

❀ unsalted butter 25g 無鹽牛油

❀ super fine flour 15g 特幻粉

❀ corn starch 10g 玉蜀黍淀粉

❀ fresh milk 65g 鮮奶

❀ 2 eggs (separated yolk and white) 雞蛋

❀ sugar 40g 糖

❀ cream of tartar 1/8 tsp tartar 粉

❀ pinch of salt 少許鹽


Method:

1) preheat oven at 150° 烘爐預熱

2) melt cream cheese + butter + milk, i like to use double boiling method 用double boiling 方式溶化芝士奶油+牛油+奶

3) after cool awhile, add in yolk, and fold in flour 稍冷后加入蛋黃,再加入粉 (切拌式) 

4) beat egg white with cream of tartar + salt until foamy, add in sugar, beat till soft peak formed (refer picture) 把蛋白加tartar 粉+鹽打到有泡沫,再加入糖打到濕性發泡 (看圖) 

5) fold the egg white into yolk mixture, in 2 batches 分兩次切拌式加入蛋白

6) pour the batter into greased and lined cake tin 倒進蛋糕盤

7) steam-bake: prepare a baking tray with hot water (put at lowest level of oven), put a rack on top of the tray, the put the cake tin on top of the rack. 蒸烘:一個盤放熱水 (放最下面層), 上面放網架,把蛋糕盤放網架上面

8) bake for 1hour and 15minutes 烘1小時15分鐘

9) leave the cake inside oven for another 30minutes (door ajar, off heat) 關電,把蛋糕留在烘爐裡30分鐘 (烘爐門開大概2") 


Greased and lined

Cream cheese + butter (and milk)

Flour sifted in after egg yolk

The yolk mixture

The soft peak

In the oven (",) 


Sunday, October 5, 2014

Cinnamon honey bread sticks 肉桂粉蜜糖面包條

非常簡易。。。是的,又一樣非常簡易的早餐。當然,這❀肉桂粉蜜糖麵包條❀可以搭配其他食物來享用:水果或葡萄干等等。。。 由于我懶惰,就沒有準備其他的搭配,也沒怎麼裝飾囉 :p

步驟很簡單啦,看圖就明白 (",)

Ingredients:
~ 1 egg 一 粒雞蛋
~ Bread, can cut up to 4 sticks from a slice, so, its up to you to prepare how many 面包,一片可以切成4條,看妳要吃多囉
~ honey 1 tbsp 蜜糖一湯匙
~ cinnamon powder for sprinkle 肉桂粉,用來灑

✌••✌••✌••✌••✌••✌••✌••✌••✌••✌

Friday, October 3, 2014

Green Tea Red Bean Cheesecake (no bake) 綠茶紅豆芝士蛋糕 (免烤)

Alright, time to try again a no-bake cheesecake.

Since my first no-bake mango cheesecake failed due to lumpy gelatin inside the cake, i have only done another two no-bake cheesecake:
1) no-bake chocolate cheesecake, nice, no gelatin needed
2) a very nice Tiramisu, yes, it is indeed very very nice, me and hubby love it so much, yup, no gelatin needed too.

So now, is a challenge for me again, a no-bake cheesecake (with gelatin), heheh, this may sound stupid to some of you, but, but, i seriously phobia with those lumpy gelatin i had with my first no-bake cheesecake maaa (~o~)


Biscuit Base:
~ 100g digestive biscuit 消化餅乾
~ 50g melted butter 牛油
Press the biscuit base into a 7" square baking tin (removable base), refrigerate♥ 把碎餅乾加牛油壓入7" 蛋糕盤 (可脫底的), 然後放進冰箱

Cheesecake:
~1g redbean paste 紅豆泥
~ 250g cream cheese 奶油乳酪
~ 250ml whipping cream 淡奶油
~ 50g castor sugar 幻糖
~ 1.5tbsp gelatin (看圖) 
~ 60g water 清水
1) Mix well cream cheese and sugar
把奶油乳酪+幻糖,混好
2) dissolve gelatin in water, by using double boil method 
把gelatin + 水,隔熱水煮溶解
3) mix well 1 & 2 
把1 + 2 混合
4) beat whipping cream till soft peak formed
把鮮奶油打至有軟勾
5) fold the whipped cream into the well mixed cream cheese mixture
打好的鮮奶油用折疊式的參入奶油乳酪混合物
6) mix in 3/4 of the 100g redbean paste
把4/3的紅豆泥參入
7) pour the mixture into the biscuit base baking tin
倒進剛才冷藏好的餅乾蛋糕盤
8) sprinkle the remaining redbean paste on top
chill for at least 4hours
在上面灑上剛才剩下的紅豆泥,然後冷藏最少4小時以上
9) sprinkle some green tea powder before served
蛋糕拿出,灑上綠茶粉,享用
♥•♥•♥•♥•♥•♥


不會翻譯gelatin, 請看圖 :) 


Digestive biscuit + butter

Cream cheese + sugar

Double boil to dissolve gelatin + water

Dissolved gelatin + cream cheese mixture
Very soft, love it (",) 

Beat the whipping cream

100g redbean paste

The mixed cream cheese mixture + 3/4redbean paste pour into baking tin


The remaining redbean paste

Sprinkle green tea powder after chilled


Hows my cake?
好吃囉,哈哈 (∩_∩)


切開會有更多紅豆,如果很喜歡紅豆,妳們可以放多過100g...

(∩_∩)